How to Learn Photoshop Editing Basic to Advance
How to Learn Photoshop editing basics so you can progress in your career? Photoshop is a must-have software for web developers, photographers, and designers. It renders text and vector graphics, provides shape tools, and works non-destructively. Its advantages are numerous, and its use by these individuals is crucial. If you are looking for the best ways to enhance your creativity, you should learn Photoshop. The additional you recognize about the software, the more imaginative and accurate you can be. Photoshop allows you to edit images and add several visual effects. In addition, it comes with advanced editing features and can improve the quality of images. This article also outlines some of the best tutorials to help you get started with your newfound skills.
Tutorials
If you are looking for a course that will teach you the basics of photo editing, you need to choose the right one. The correct approach is the one that can help you become an expert in Photoshop. Photoshop is a great program that allows you to make stunning images with just a few clicks, and there are excellent online courses manageable to assist you in learning more about this superb package. In this content, you will absorb what way to learn Photoshop editing is rudimentary to advance.
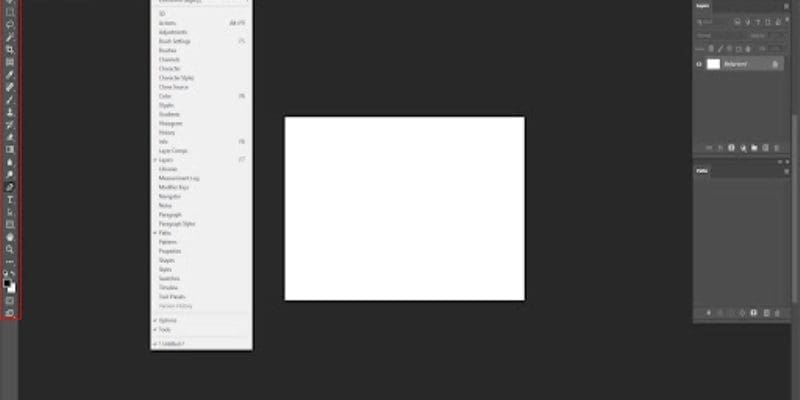
The first steps in learning Photoshop editing include understanding the program’s user interface and how to navigate panels and screen modes. After you know the basics, you will move on to adjusting and arranging files, organizing folders, and finding metadata. You’ll also learn about the Marquee tool, which lets you make selections based on geometric shapes and work with layers of different forms. You’ll study how to use the Lasso Tool, a general digital photo editing tool. It makes free-form selections, both linear and angular.
Techniques
The techniques to learn Photoshop editing basics and advanced are divided into 18 modules. The course is divided into several sections, such as learning about layers, clipping masks, blending modes, color, and hue adjustments. The study also includes many practical projects to help you learn how to apply these techniques in your photography. After ending the system, you’ll be capable of activating and editing images with relief.
Once you’re comfortable with the basics, you’ll be able to advance your skills and create special effects for various purposes. You don’t need to be an endowed artist to generate cool-looking photographs. You can use Photoshop to create stunning images for multiple purposes, from birthday cards to movie posters. Learn how to manipulate, crop, and adjust images with various tools and features! Here are some techniques to learn Photoshop editing basics to advance in Clipping Arts India.
Tools
If you’re interested in becoming a professional clip artist, you should know that Photoshop is a necessary tool to create high-quality illustrations. This course covers the basics of image editing and combines them into one image. You’ll learn how to adjust the color and tone of photos, use layer styles, and select parts of the image. Students will leave the course with a certificate in their hand.
The course will help you learn the various tools and features available in Adobe Photoshop. You’ll learn how to edit your photographs, switch the background of images, remove wrinkles, and more. You’ll learn how to create a variety of graphics and brochures. You’ll also learn how to make simple digital paintings using Photoshop. This course will get you industry-ready and change how you think about photos and images.
Background change
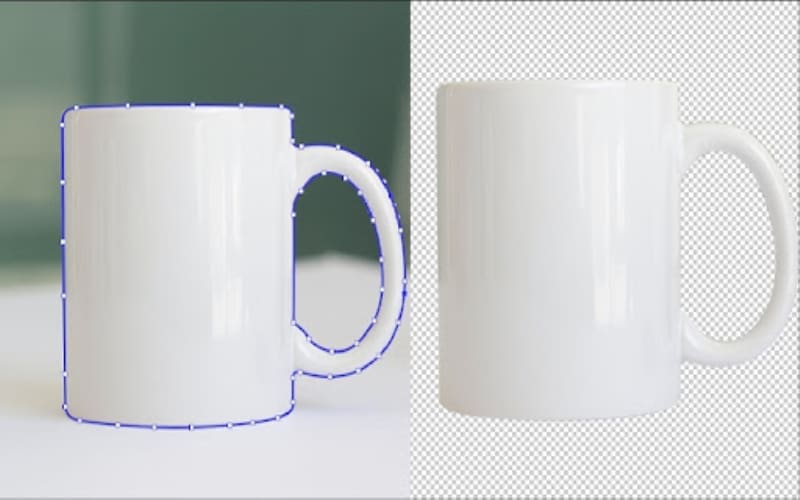
Learning Photoshop is an essential skill for anyone in the clipping arts industry. There are many different ways to learn this powerful program. Here are some tips for beginners to master the essential functions. You can start by practicing with the Pen Tool. Activate it by pressing the ‘P’ key on your keyboard. You can also play the ‘Bezier Game’ to practice using this tool. Another good option is to learn how to work with Camera Raw Filter, a great alternative to Adobe Lightroom. Its features allow you to work with 3D and text and create beautiful looks using layer styles. To get started with this program, check out these tips:
Retouching
To start your career as a professional retoucher, you must have a strong knowledge of Photoshop. Retouching is an integral part of the editing process.
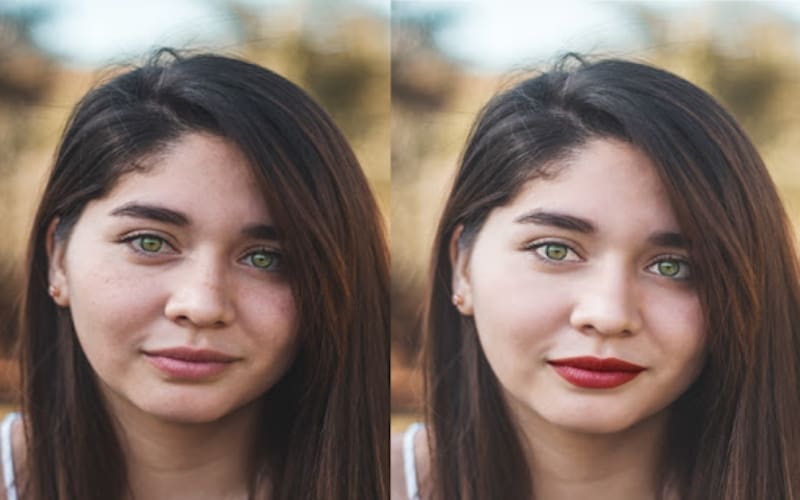
You need to know how to correct light, skin, color, and even warp an image. It would be best if you understood how to use masks and adjustment layers. You can learn these techniques by attending a Photoshop retouching course. The first course will help you to master the basics of Photoshop.
Use Layers in Photoshop
One of the most popular tools for Photoshop editing is the Layers panel. You can use layers to manipulate different parts of an image. In fact, most photographers and photo editors use layers to retouch their photographs, build collages, and fix mistakes.
Photoshop layers make it easy to change the appearance of a photo without affecting the rest of the image. Here’s how to use layers. Here are some examples of how to use Photoshop layers.
Photoshop layers are stacks of different levels on which to place an image. They are important for the design workflow because they let you focus on separate areas of an image without disrupting the other. They also allow you to add text, change color, and even put two pictures on one page. In Photoshop, layers are accessible from the Layers panel located on the right side of the window. Once you’ve discovered how to use layers, you’ll be able to create impressive images with minimal hassle.
You can also use the Layers panel to group together multiple layers. You can do this by choosing ‘Group’ from the Window menu, or you can check the Layers checkbox in the Layers panel. After checking this box, the Layers panel will appear. In Photoshop, you can create a new Layer by using the SHIFT+CTRL+N keyboard shortcut or clicking on the New Layer icon on the menu.
Use Layer Mask in Photoshop
When editing an image in Photoshop, you’ll often use the tool called the Layer Mask. This tool is a handy tool that lets you copy and paste layers without having to make a copy. This tool is also called a mask, and it functions the same way for all types of layers. The reason layer masks are used differs with each type of layer, however. Here’s a look at how each one works.
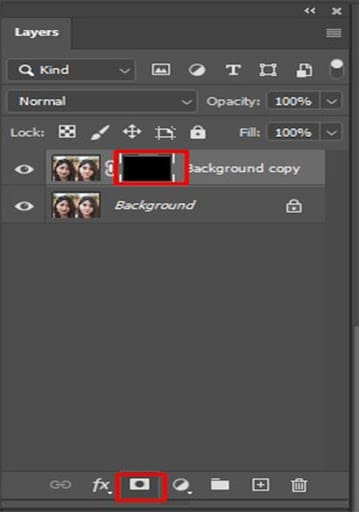
Layer masks allow you to make changes to the transparency and opacity of an image. You can select a layer and use the eraser tool to remove a part of the layer, but you can undo a portion of your changes by using the “step back” function in Photoshop. Another great feature of layer masks is that they allow you to create transparency gradients without changing the overall image. You can even use layer masks with Pexels stock images.
Once you have selected your layer, you can move it to a new location or use it to duplicate it across several layers. You can also copy a layer mask by pressing Alt or Option on a Mac. After you have copied it, you can reposition it on another layer to make it more visible. Once you’re done, click the new layer mask to apply it to the new layer. You can then save the changes you’ve made to your project.
Use Clipping Mask in Photoshop
Once you have understood how to use clipping masks in Photoshop, you may find yourself using them more often than you thought. To make use of this useful tool, we’ve gathered some tips from UK photographer Andy Day, who specializes in architectural, landscape, and adventure photography. Read on for more information! Let’s begin! Using a clipping mask is easy once you understand how it works. It’s important to choose the right size and shape for the mask.
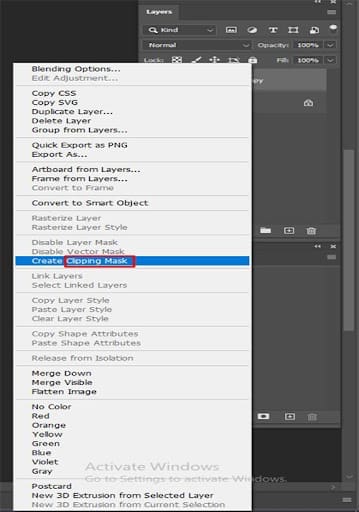
When you create a clipping mask in Photoshop, you must select the TOP layer of the image you wish to clip. To do this, simply click the option key on your keyboard, or hover your mouse over the image to select the layer. This action will crop the image so that its dimensions are square. After creating the mask, you can move the photo layer so that you can apply curves or another adjustment to it. In this way, you can easily crop a photo without losing the original content.
Once you have selected the layer you wish to clip, you should move the mask content. The easiest way to do this is to choose the topmost layer and then hit the Move Tool or workspace toolbox. From there, you can simply drag the mouse cursor to move the mask. You can also use this method to remove fringing from composite images. Likewise, you can use clipping masks to add texture to smooth skin.
Use Blending Modes in Photoshop
To learn how to use blending modes in Photoshop, read on! There are many ways to use this feature. It can be time-consuming to experiment with all the options. Keyboard shortcuts make it easy to scroll through the different modes. Simply double-click inside of the blending mode box and use the scroll wheel to move through the list. You can also use the arrow keys on your keyboard to switch between the various blending modes.
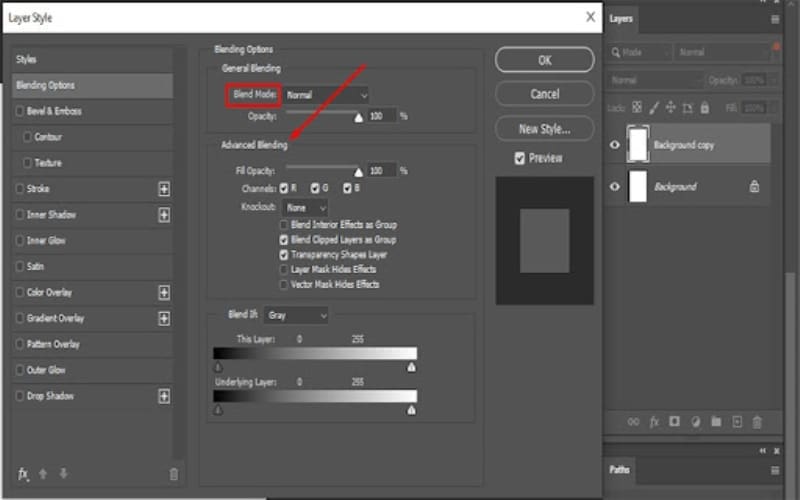
Before you begin using blending modes in Photoshop, you need to first decide on the effect you want to create. Play around with the opacity and fill of different layers, and you’ll soon see which one works best for your photo. If you’re not sure which blend mode to use, you can also mask out certain parts of the image and save it as a PSD layered file. If you’re unsure about which blending mode to use, download a PSD file of the image first and play around with it until you find the best one.
In a simple example, we’ll use the Difference blend mode to combine two images. Darken is part of the “Darken” group and multiplies the dark pixels in the foreground layer with those of the background layer. This creates a more uniformly dark image because the light pixels are removed. Alternatively, we can use Lighten or Screen blending modes to change the color of an image.
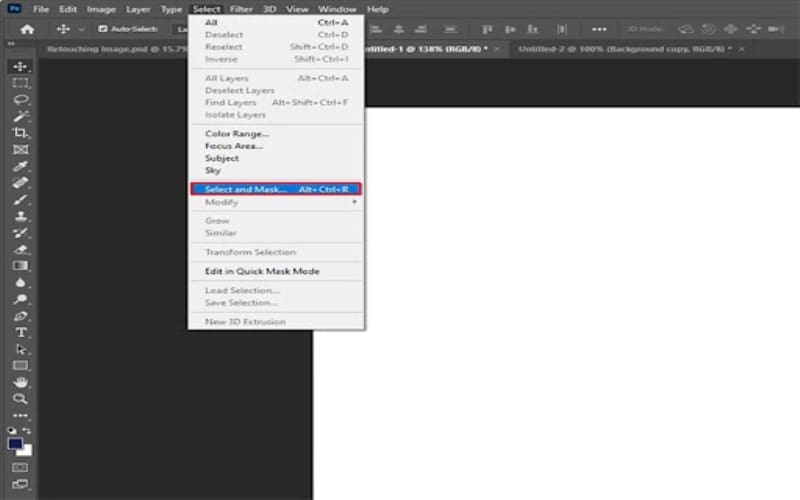
Create Selections in Photoshop
Creating selections in Photoshop is easy once you know a few tricks. Firstly, make sure that no existing selections are active, and then go to “Select” – and then click on the new selection to add to it. Deselect any selections you don’t need and save the new one. This will give you a clean selection. After creating your selection, you can start working on it.
The next step is to change the color balance of your selection. The red slider changes the colour balance in the selection, and makes the selected area red. The red slider will affect everything inside the selection and everything outside it. It’s a great way to change the look of a whole image quickly and easily. You can even change the color balance for each individual pixel. In this way, you can select a single pixel from many to match a specific color.
There are many types of selections in Photoshop. You can create hard selections for specific areas, or create luminosity mask selections for the background. These will be discussed in separate tutorials. In any case, make sure to save often while working with selections. It’s also a good idea to give your selections convenient names that won’t make it confusing to use them. This way, you can identify the ones you need and reuse them later.
Dispersion Effect
If you are interested in learning how to create a dispersion effect in Photoshop, there are a few things you need to know. The Photoshop Dispersion Tool lets you break up a portion of an image into smaller pieces. You can also find a tutorial online to learn how to do it. Before you begin, be sure to have a layer selected and ready to use. You can then drag the areas of the image out to create the dispersion effect.

Select the layer with the dispersion effect and add a layer mask. Then, press the Alt/Option keys while selecting the Dispersion layer. Next, select the Dispersion Effect Brush tool. Make sure that you have black as the color. Click OK to apply the effect. Then, adjust the brush radius as desired. You should see a smudged image. Now, you can add the mask.
Now, let’s begin. The image should have a solid background with the subject isolated. This will make the object look like it’s disintegrating. After completing the steps above, you should save the image as a layered PSD and duplicate it. This will allow you to create multiple images with the dispersion effect. You can then use them in your projects. You can use them to create a 3D image or object.
If you want you can learn more about this Video
Conclusion
Learning Adobe Photoshop can be an easy task through Clipping Arts India. This program is not only difficult to use, but it also requires a high level of technical knowledge and experience. Fortunately, several Photoshop editing courses are available to help you learn the basics of this popular program. Here are some of the critical features of this program. This tutorial will help you understand the basics of the software, as well as more advanced skills needed for professional-level work.
The course teaches you how to create and manipulate clipping paths in Photoshop. It is not difficult to learn, but you must watch the tutorial several times to get an idea of what to do. Clipping arts India tutorials are one of the most popular courses. They include step-by-step guides, enabling you to practice on real projects before investing in a more comprehensive course.
This course covers everything a beginner needs to know about this popular software program, from the basics to pro-level techniques. You’ll learn how to navigate Photoshop, use blending modes, layers, masks, curves, and selection tools, and use brushes and layer styles to enhance your photos. It is an excellent option for beginners or intermediate users of the program. It is divided into 18 modules, each with its own learning goals.